It’s been one year since we’ve moved into our new home. We’ve just finished up quite a bit of renovations, including a new kitchen! When we began looking into selling our previous home and moving closer to my grandparents, we were ideally looking for a kitchen that needed replacing.
I personally didn’t want a home that had just recently had a remodeled kitchen because after looking at so many homes, having a newer kitchen would have been nice, but they still weren’t done to how I would have liked in terms of both style and layout and then I’d get sick of, or have pain points, in a kitchen someone else designed eventually!
So we moved into this house knowing right off the bat we were going to be building an addition because there wasn’t really a dining room space, and remodeling the kitchen. The week we closed we began getting quotes and meeting with contractors. We didn’t unpack much of our things in the kitchen, or on the main living level being we knew we’d be doing the flooring. This kind of sucked being we lived out of boxes/very minimally basically from April 2020 until March 2021, but it was worth it eventually!
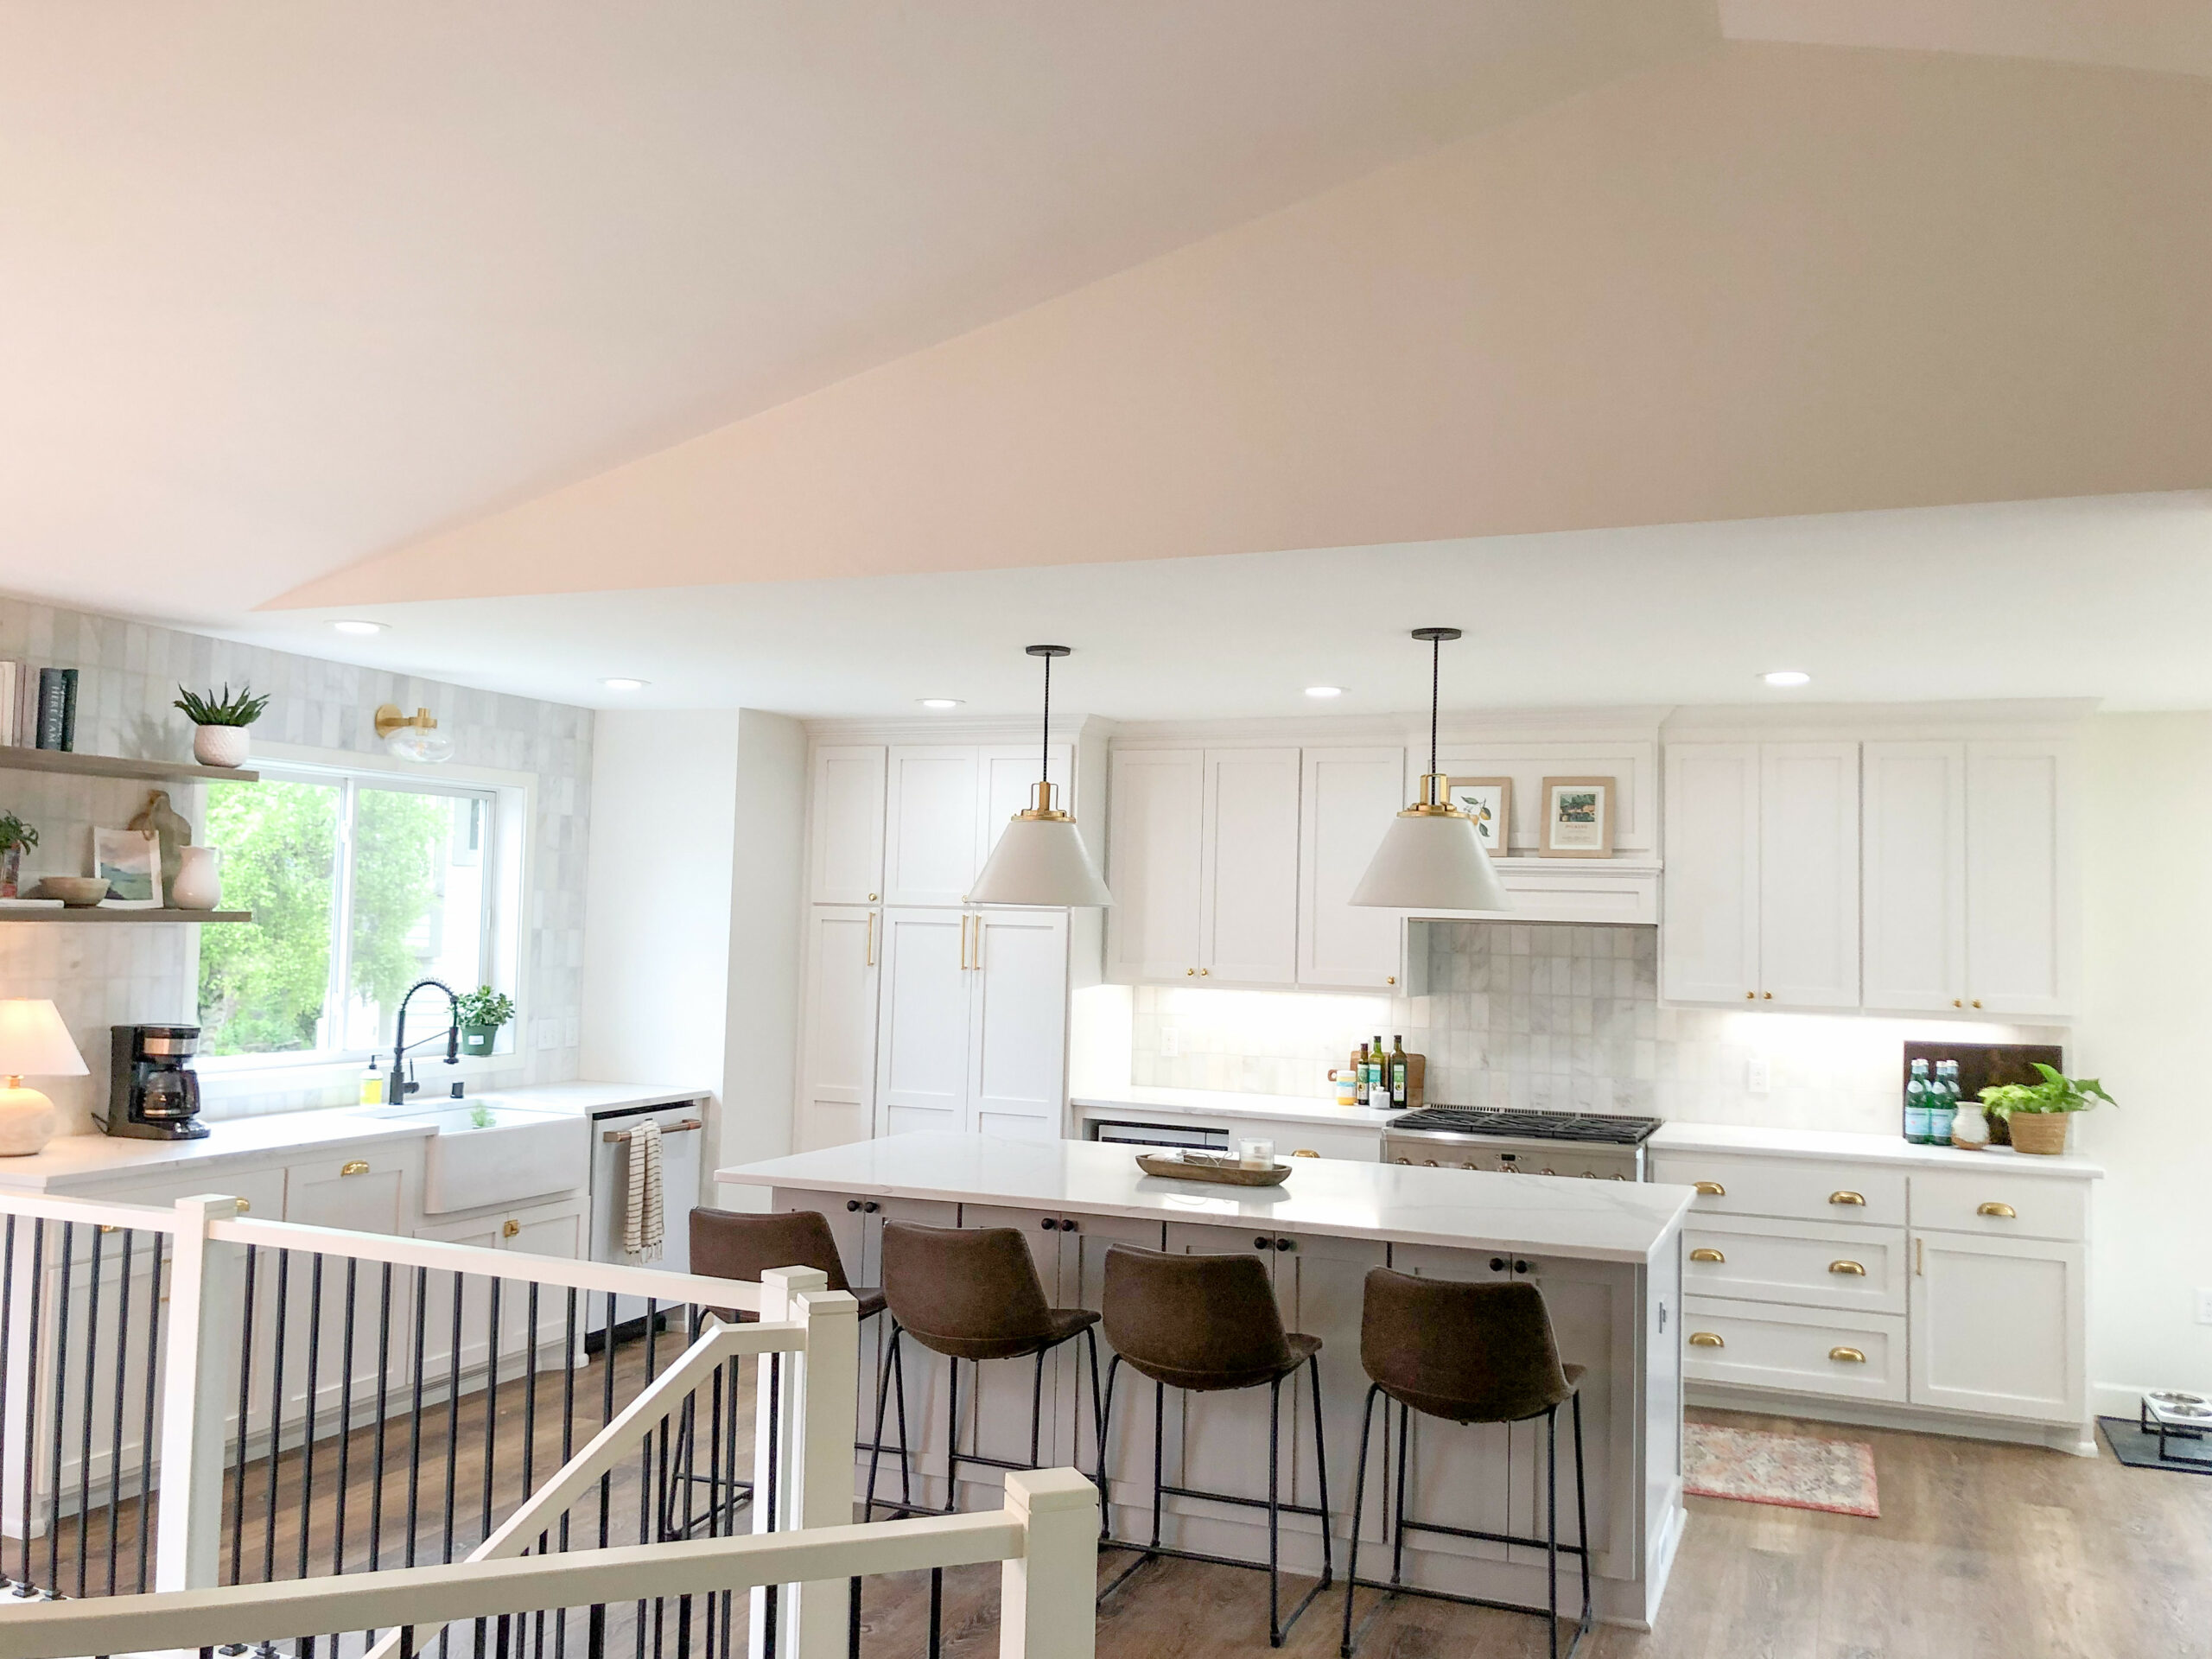
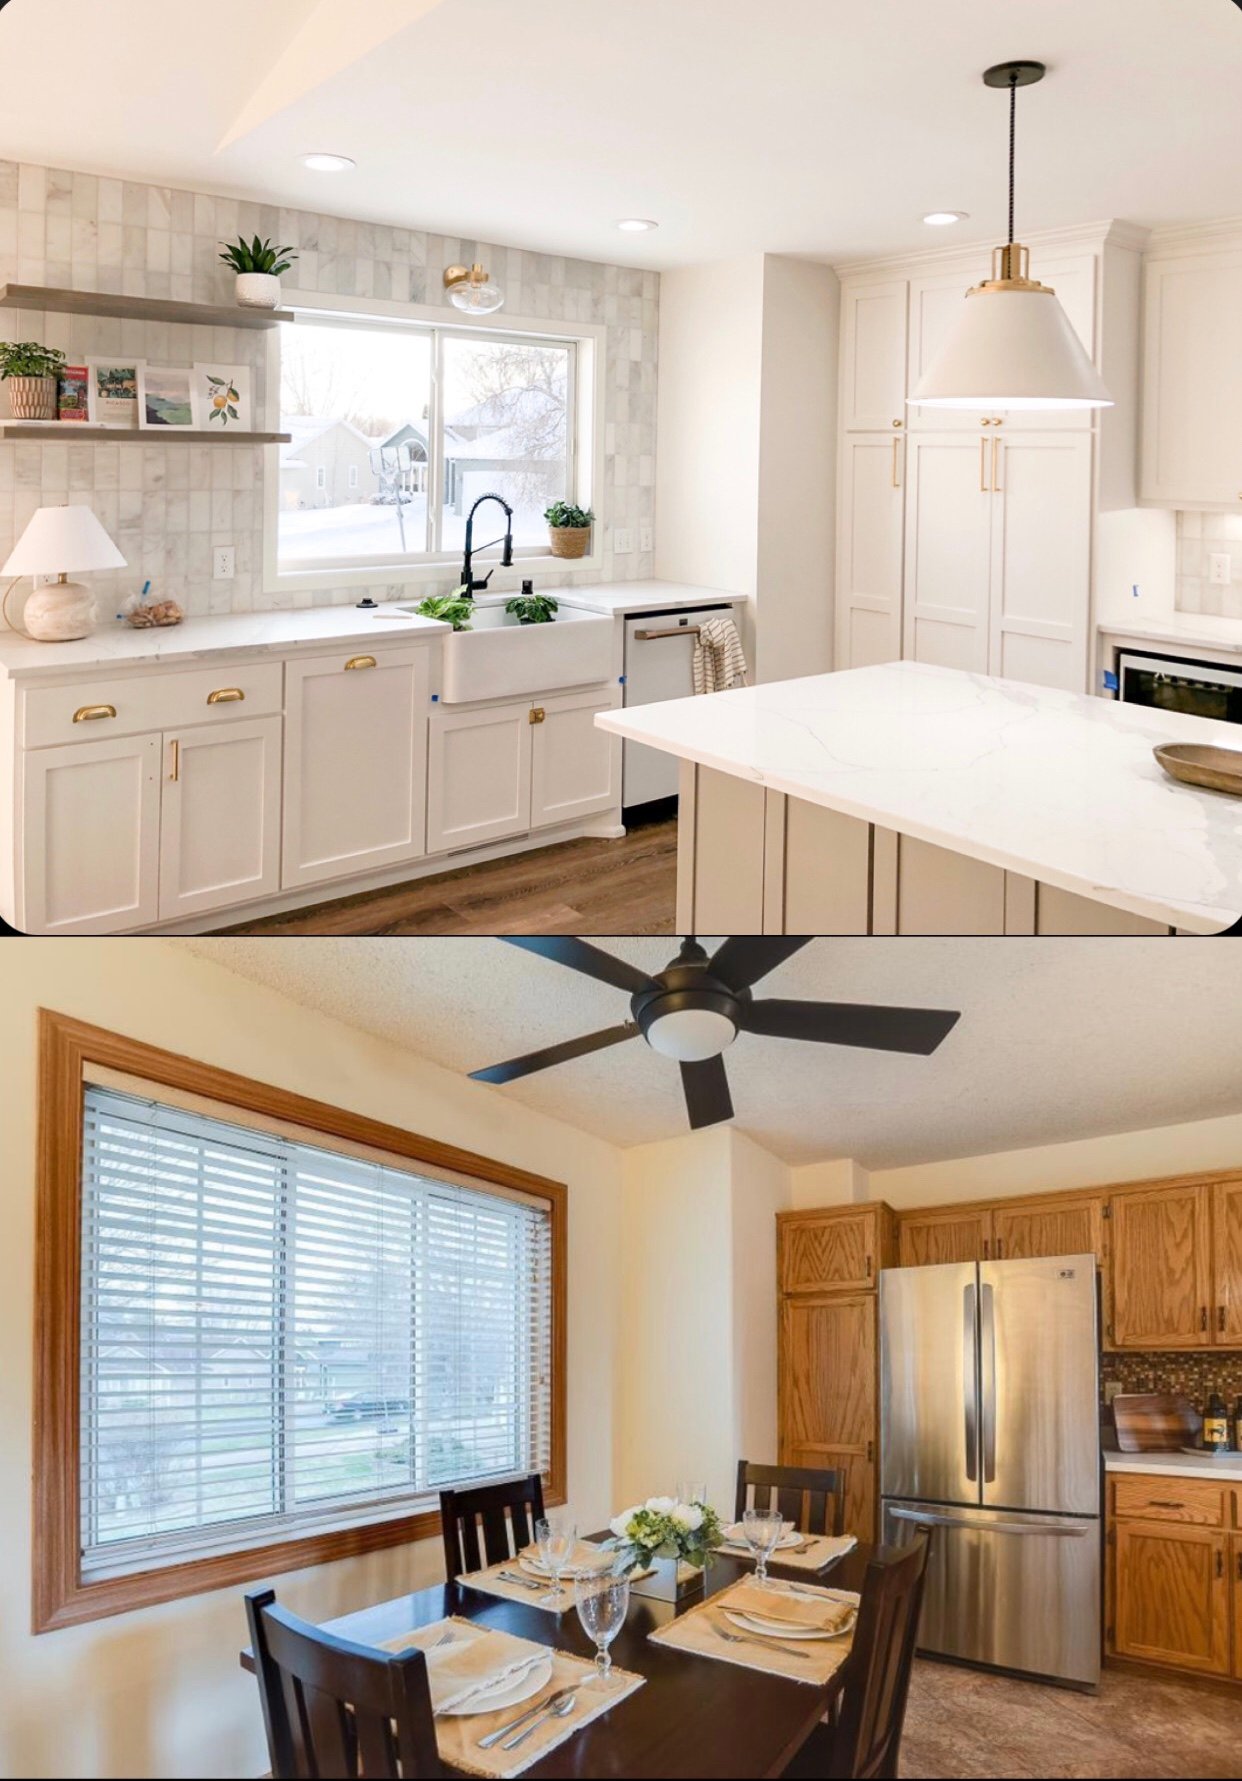
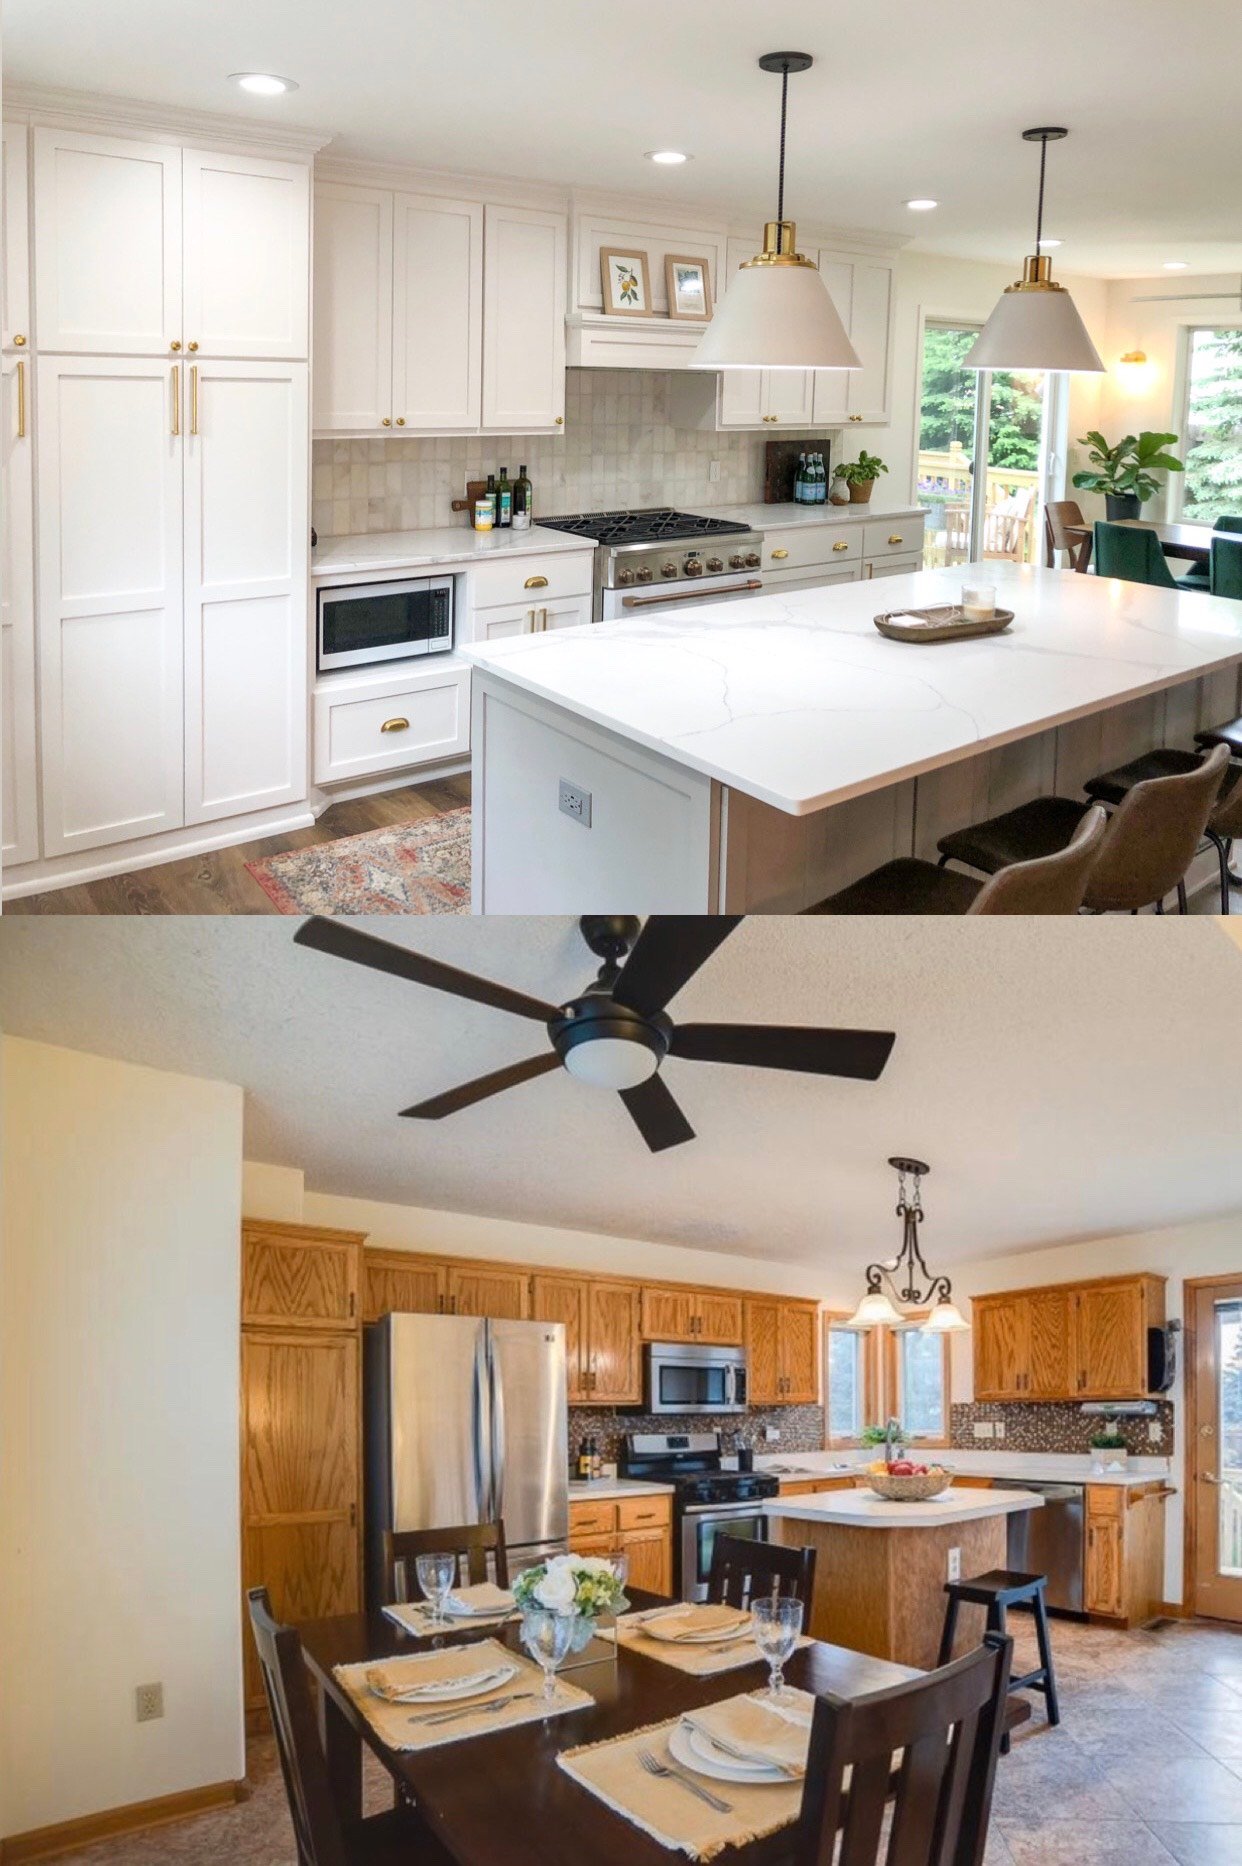
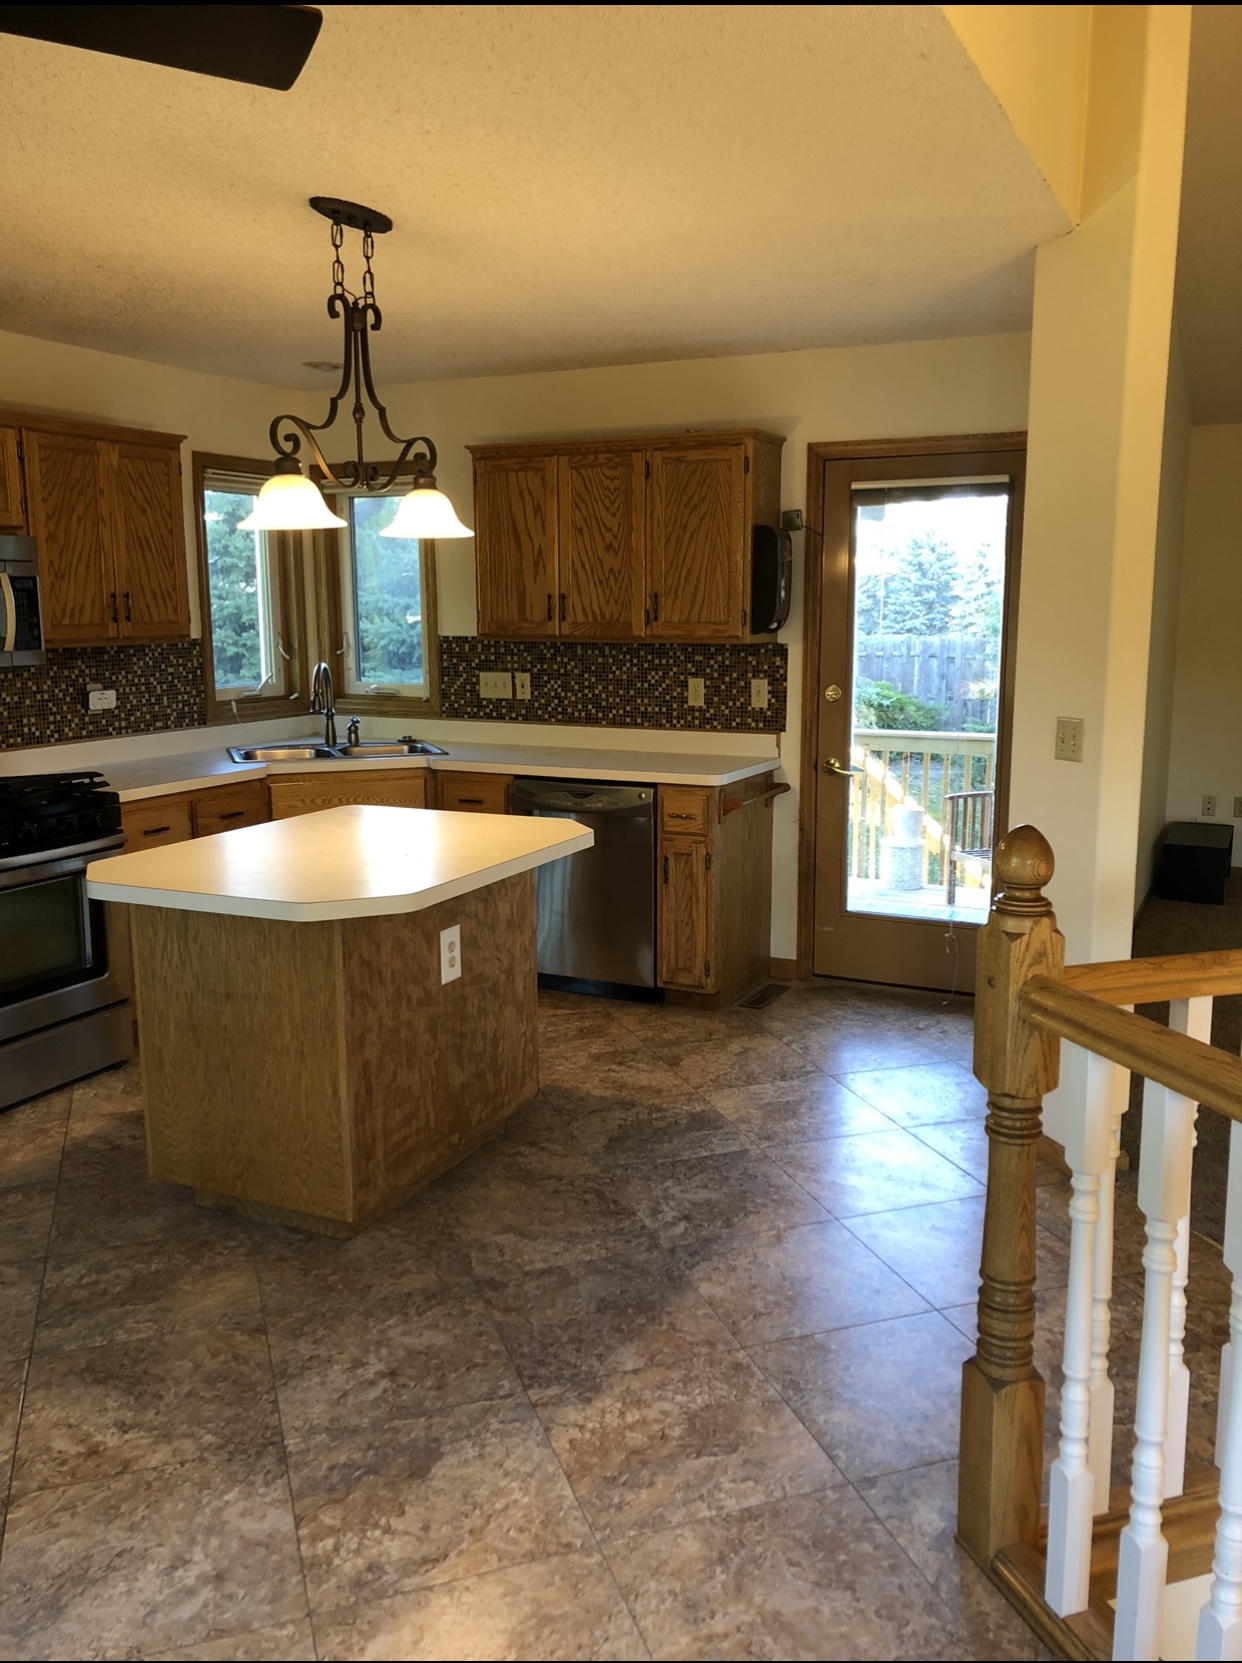
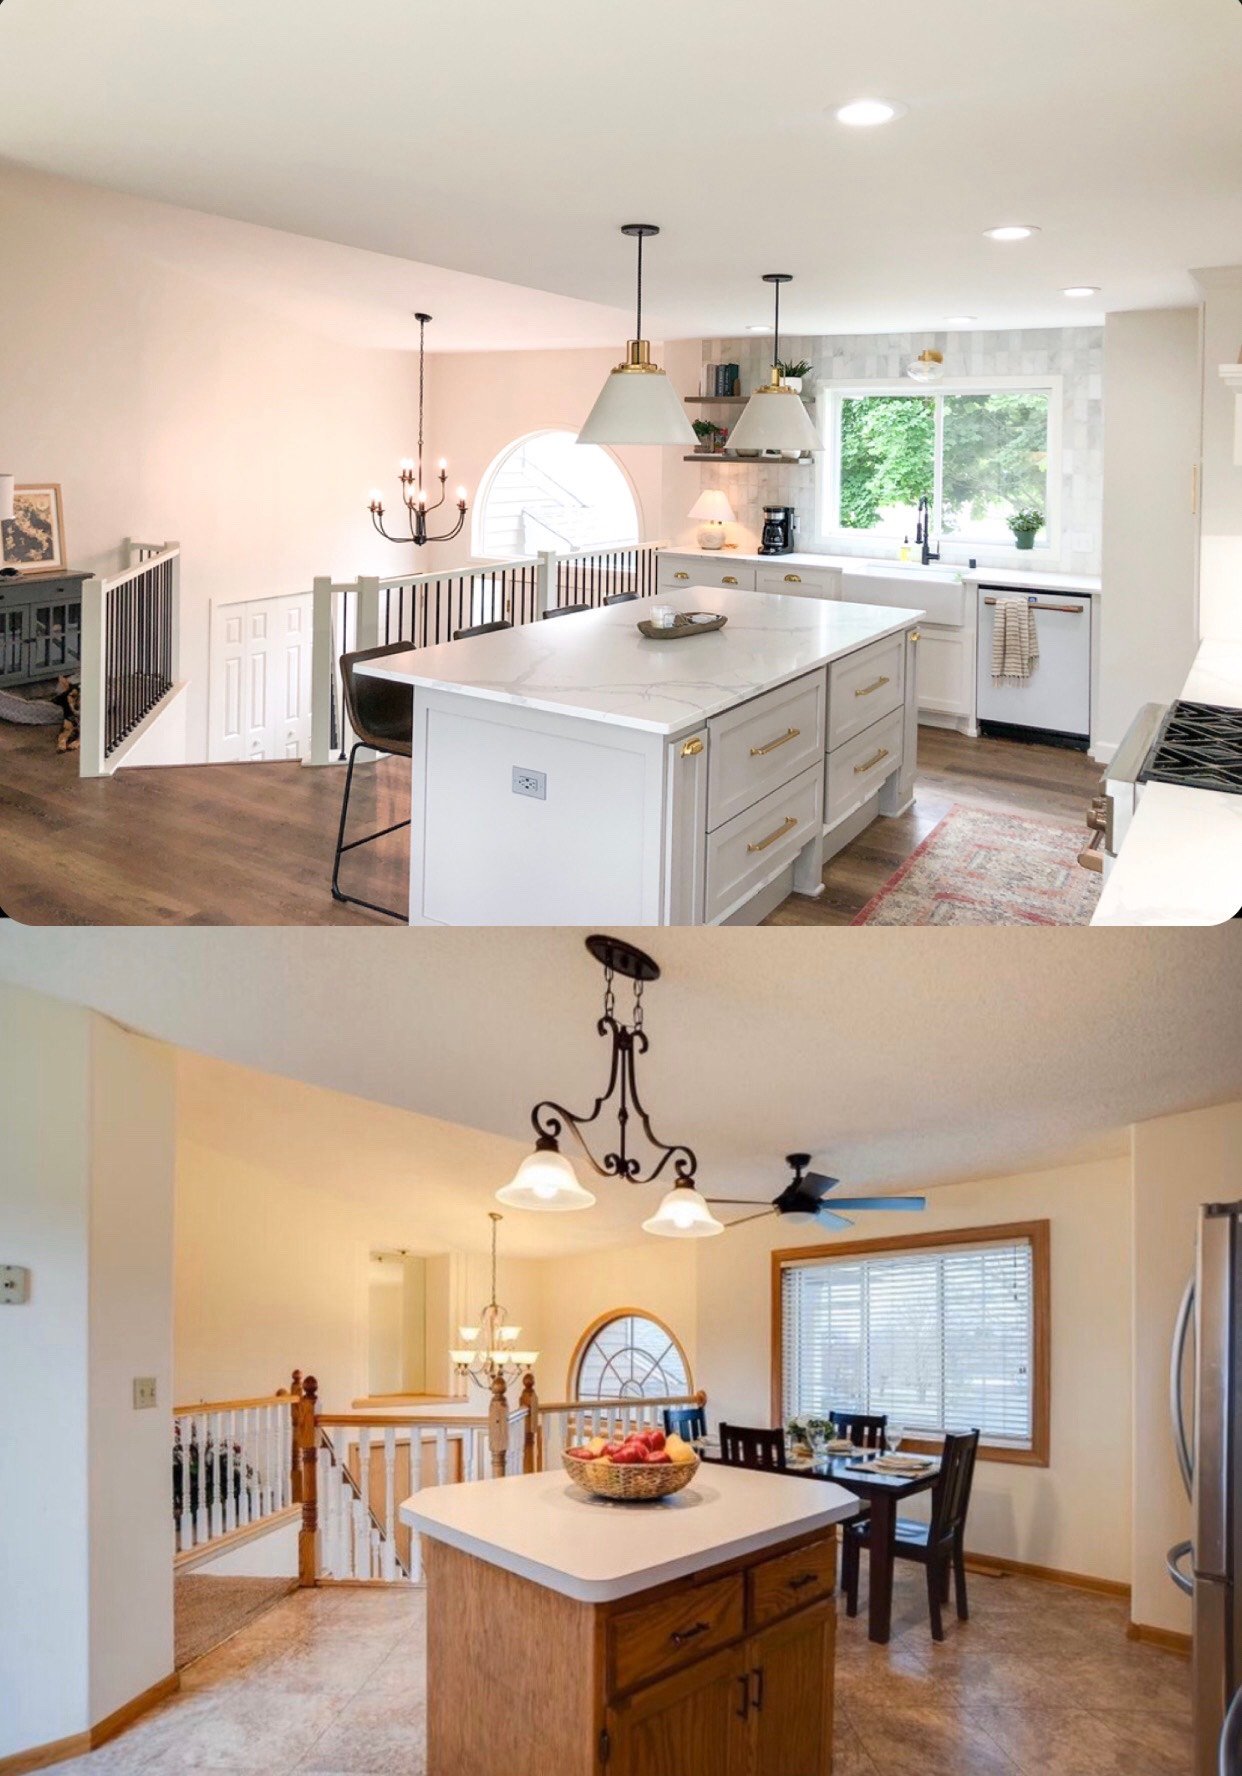
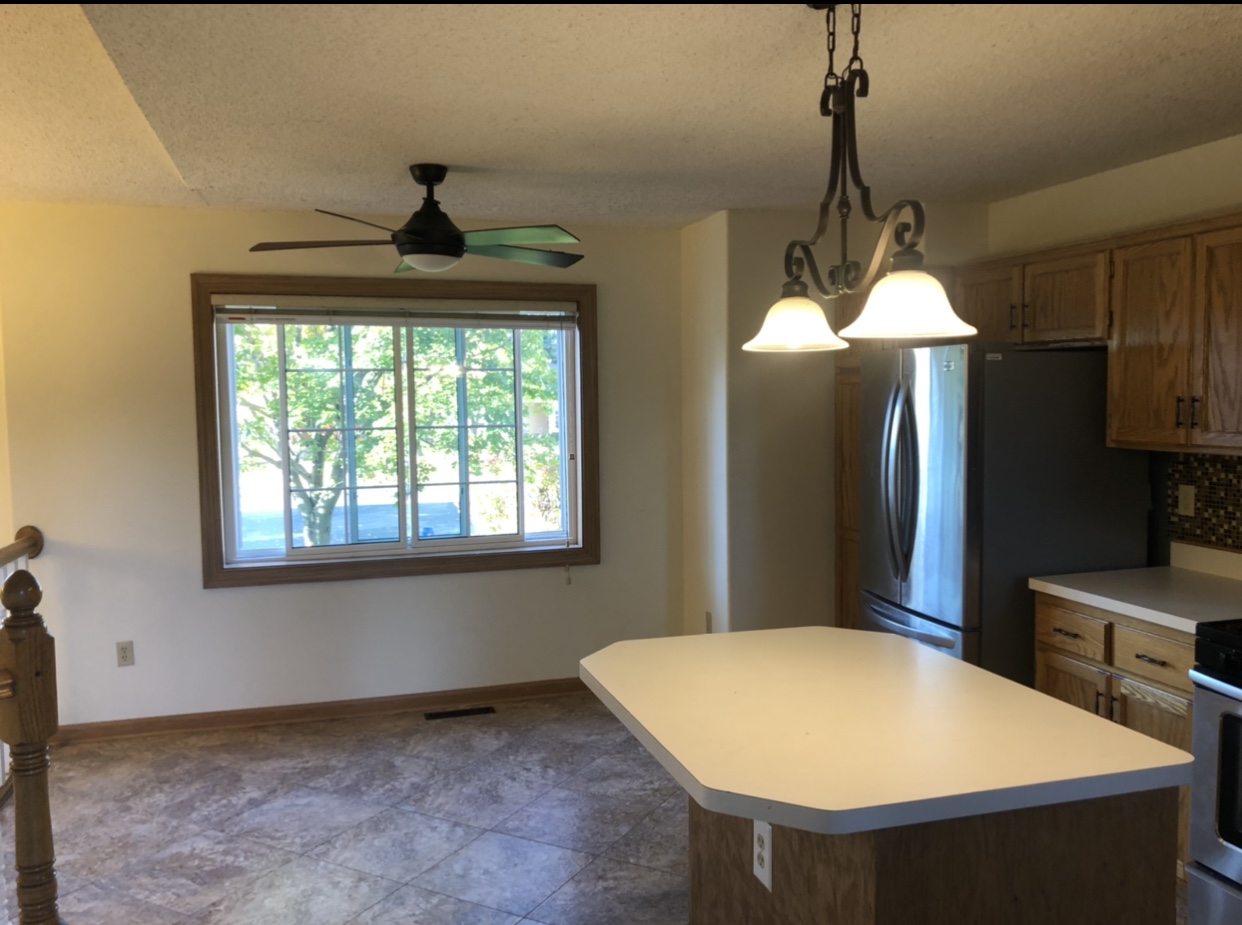
There were quite a few things about the kitchen as it was when we bought the house that would need fixing/updating, and things that I’m glad I didn’t have to live with longer than we did. For example, the island was so small, and placed so close to the oven that when the door was open, no one could stand in front of the oven.
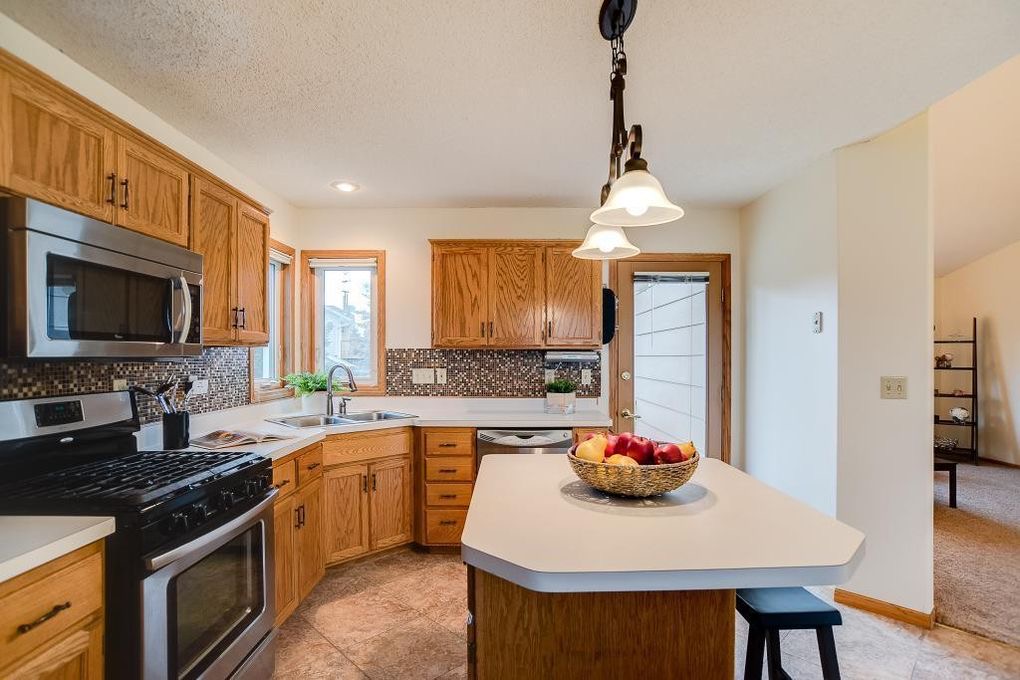
You had to stand on one side to take anything out or put anything in. Not ideal for heavy and hot dishes! The island only had room for 1 seat, and there wasn’t really any real dining area space either, at least not one that wasn’t shoved up against the wall and railing. A lot of the cabinet drawers were also very warped and old that it was hard to open and close them!
Choosing Our Contractor
We met with a few contractors that were recommended to us and the process with all of them was about the same. They came over and walked through the house with us as we discussed what we wanted to do. Then they put together a proposal that included all of the aspects of the job including plumbing, electrical, HVAC, carpentry, paint, etc.
The scope of our project pretty quickly escalated into not just the addition/deck rebuild and kitchen. The kitchen was already open to the living room and double story entry way, so it didn’t make sense not to carry what we were doing removing the popcorn ceilings, replacing railings/light fixtures, doors/closet doors, trim and flooring throughout the main level. In total, it ended up being 7 rooms that were touched/redone in some facet.
After meeting with the contractors, we got a feel for how they communicate, what their process was and just their overall vibe. The one we ended up choosing we genuinely really enjoyed. He was way more excited about our project than any others had been, had great ideas of his own, and you could just tell he was experienced, would be able to lead us in the right direction, and loved what he did.

Saving & Budgeting
I can only speak for our contractor, but the way they modeled the payment structure was that we put 20% down. Then after that, it was broken up into 5 payments of varying amounts that covered the work that they had done. So for example, after the addition was framed, roofed and sheet-rocked, we paid for that. After plumbing was moved, cabinets and windows were installed, we had another payment due. So on and so fourth until everything was done.
This made it much easier for us to visually see and budget for, being it was spread out over 7ish months (thanks to the delays). We’d also been saving long before we even sold our previous house, because I knew I wanted a kitchen I designed and that would work for the way I specifically use my kitchen space. We’re fairly minimalistic when it comes to spending money to begin with. We also had the profit from the sale of our previous home to add to our remodel budget. I use a high yield savings account with Ally which lets me separate savings into “buckets” which I highly recommend for savings goals!
Being Flexible vs Non-Negotiables
I got the question “how to decide what to include in the budget” in some form quite a bit during the remodel process. Before I started, I had to get really clear on what my non negotiable items were both in terms of style and design/layout. Knowing the things that were absolute musts made it easier to be flexible when it came to things I cared less about and could spend less money on by choosing cheaper options for.
This will be different for every house and family. I spent a lot of time thinking through how and why I use the kitchen for our current family and business, as well as our future plans (such as having family gatherings, adding more employees to my business which is ran out of my home, hosting holidays, children, etc.) These decisions guided what I wanted for the layout, cabinet design, proximity to dining room, size of the island, and literally every choice!
For example, I knew I needed specific things for my cabinets, so we opted to have custom cabinets built and to work closely with them on everything I needed to fit in and how it would be laid out. This was one of my “musts”, and we put more of the budget there, which allowed me to be more flexible when it came to selections I cared less about, such as going for cheaper selections on the new doors and trim we installed.
An example of the way this concept worked in terms of the overall style of the remodel was that I choose to go with the hardware/pulls I truly loved, were heavy-duty and more expensive in the kitchen, and then was more flexible for the bedroom closets, linen closets, entry way and new bedroom door knobs and pulls and chose cheaper items which kept us within budget.
Plans & Cost
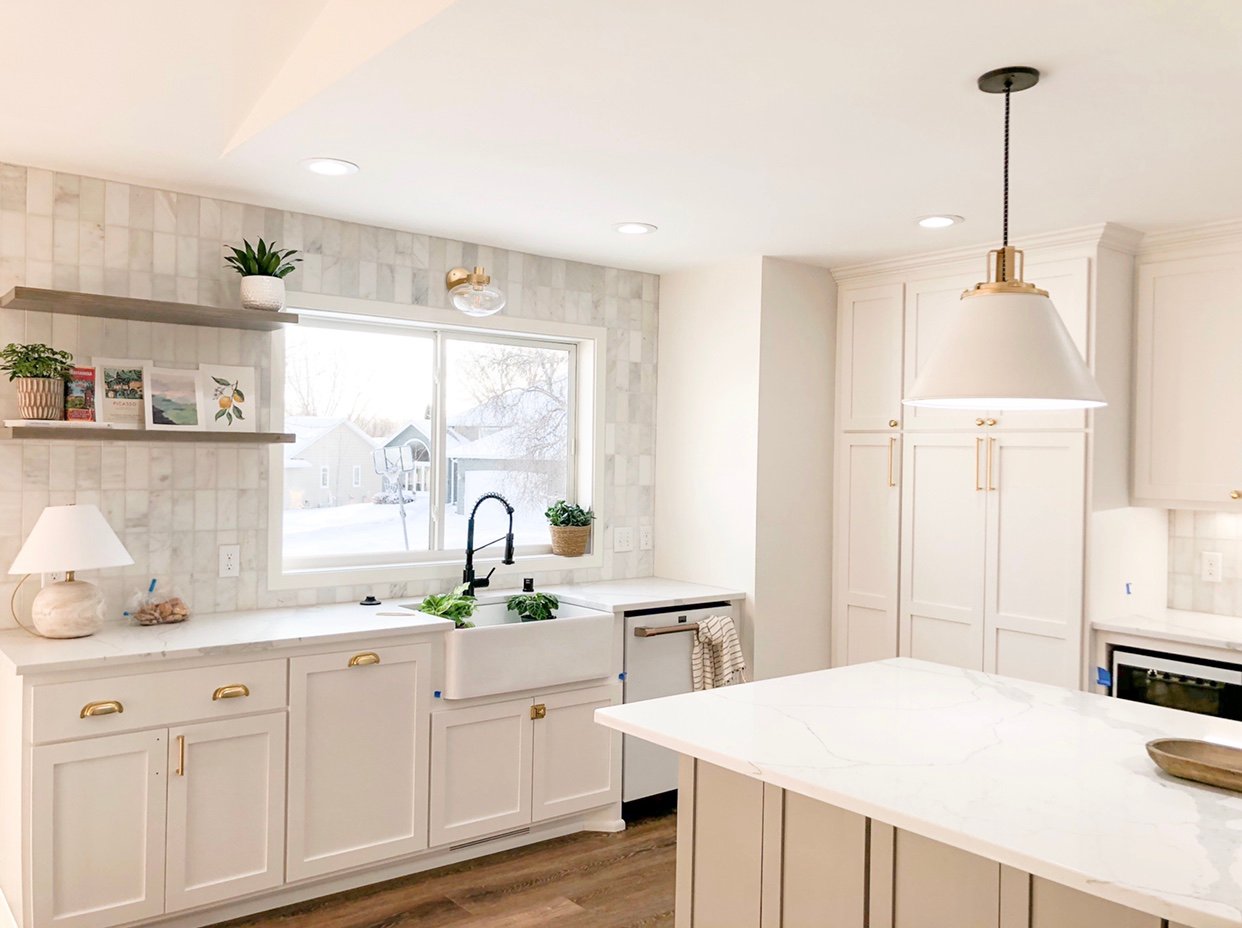
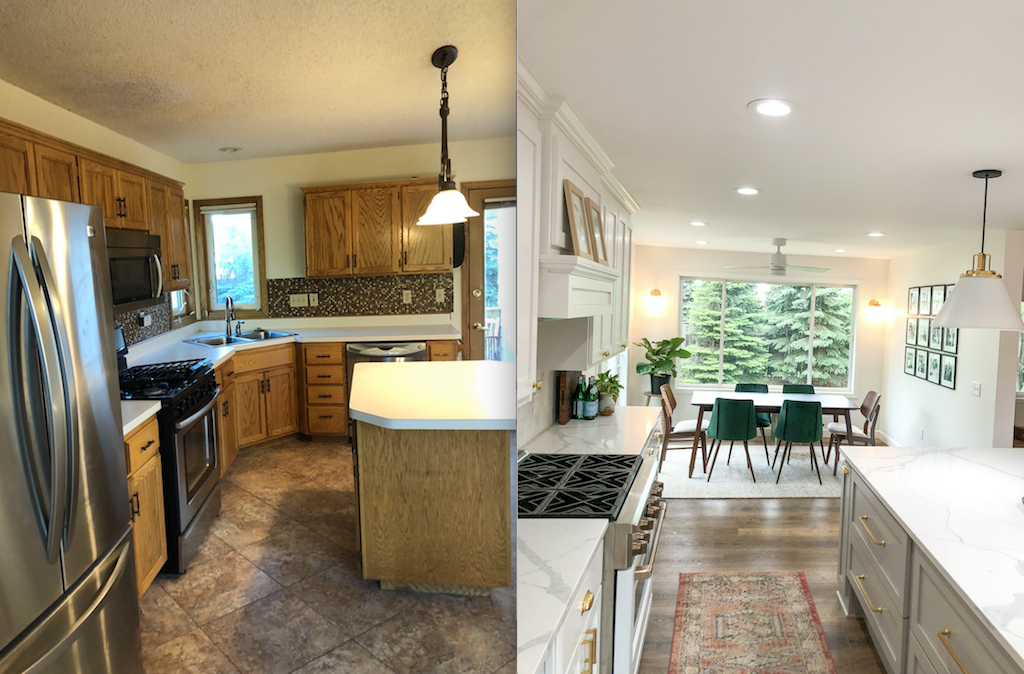
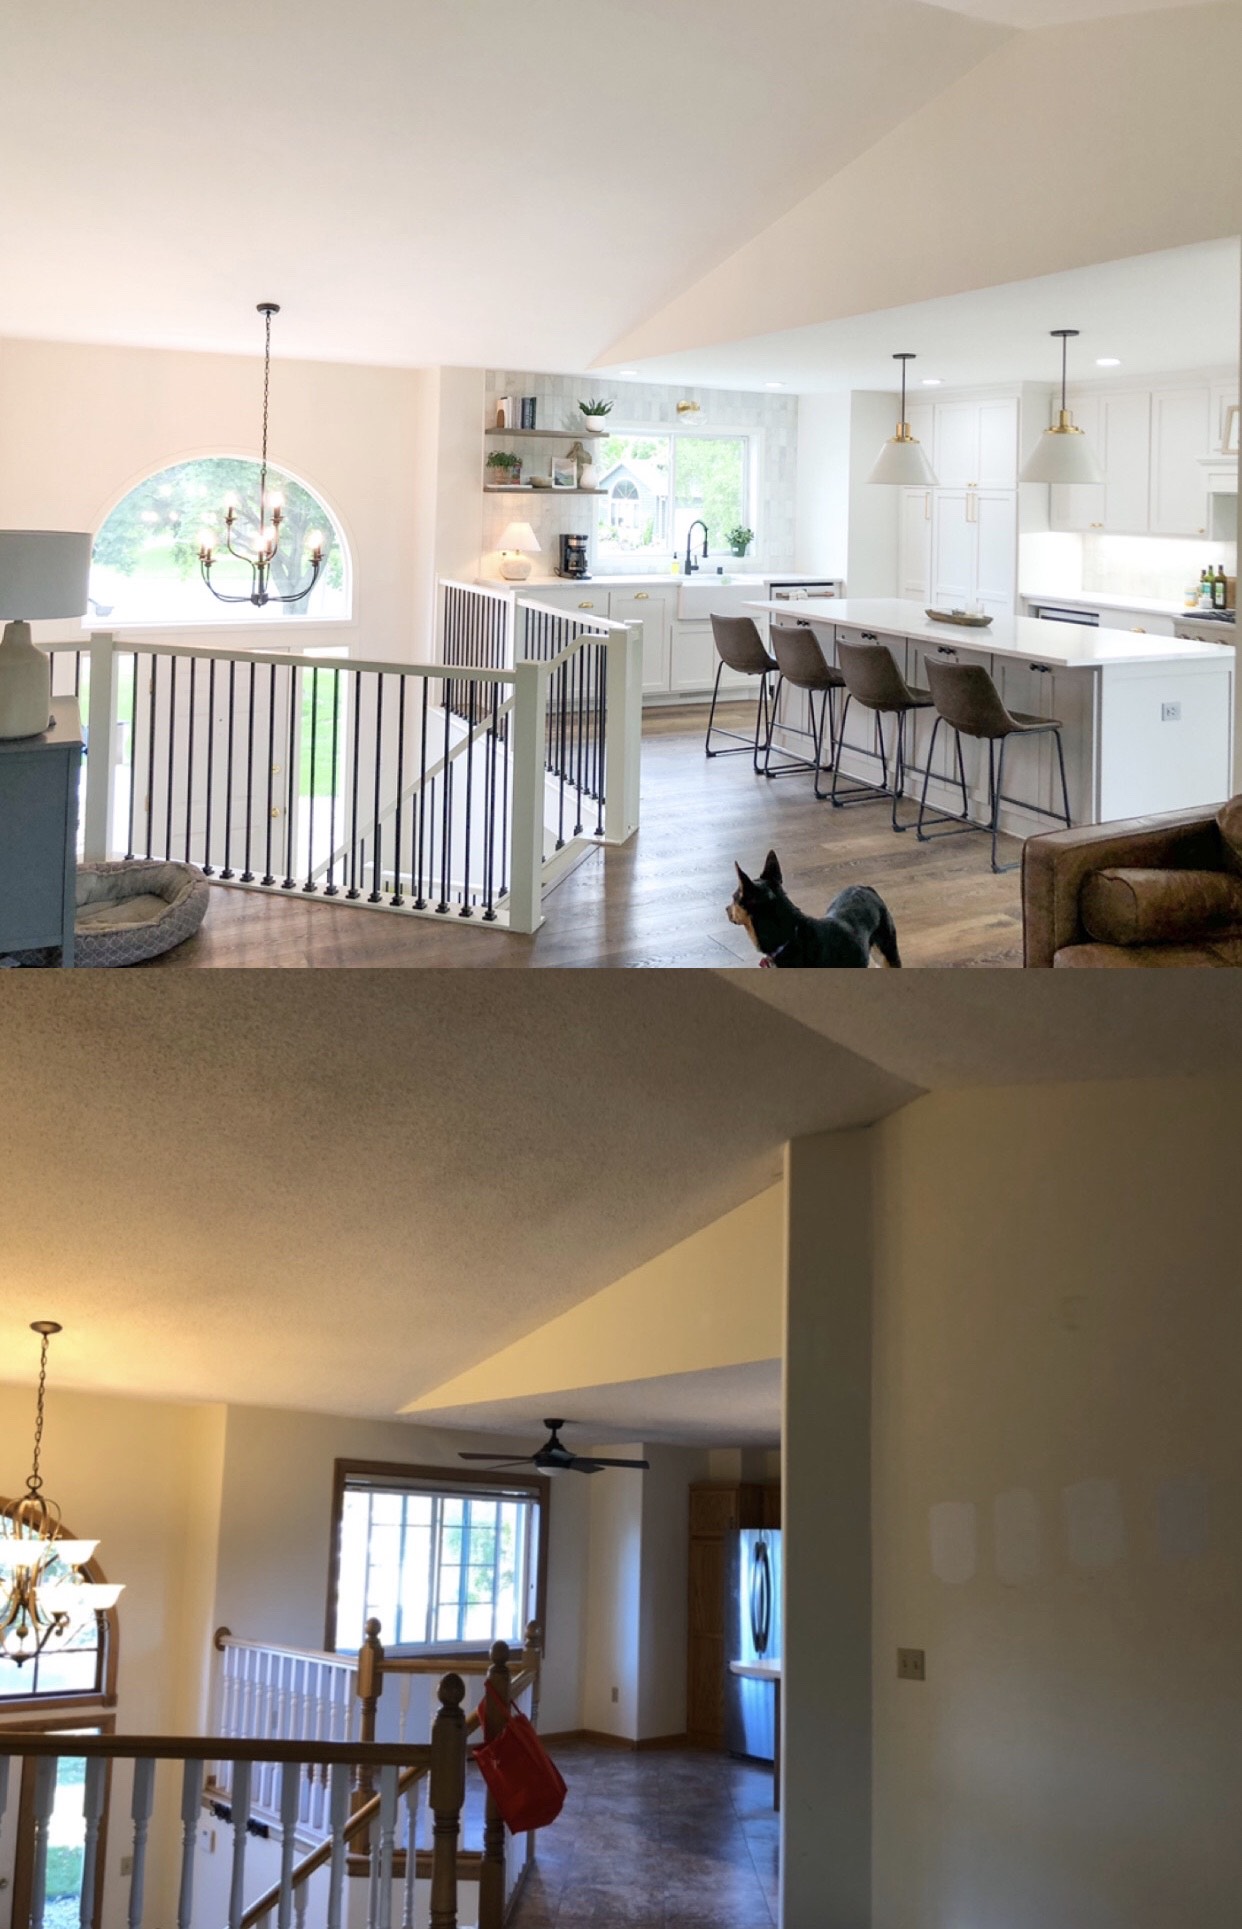
Our plans for the kitchen included opening it up by doing the addition, and removing about 6 feet of wall that was angled kind of oddly between the living room and kitchen. We also redid the layout by moving the sink and dishwasher from the corner to the opposite side of the kitchen being where the sink was would now be open to the addition.
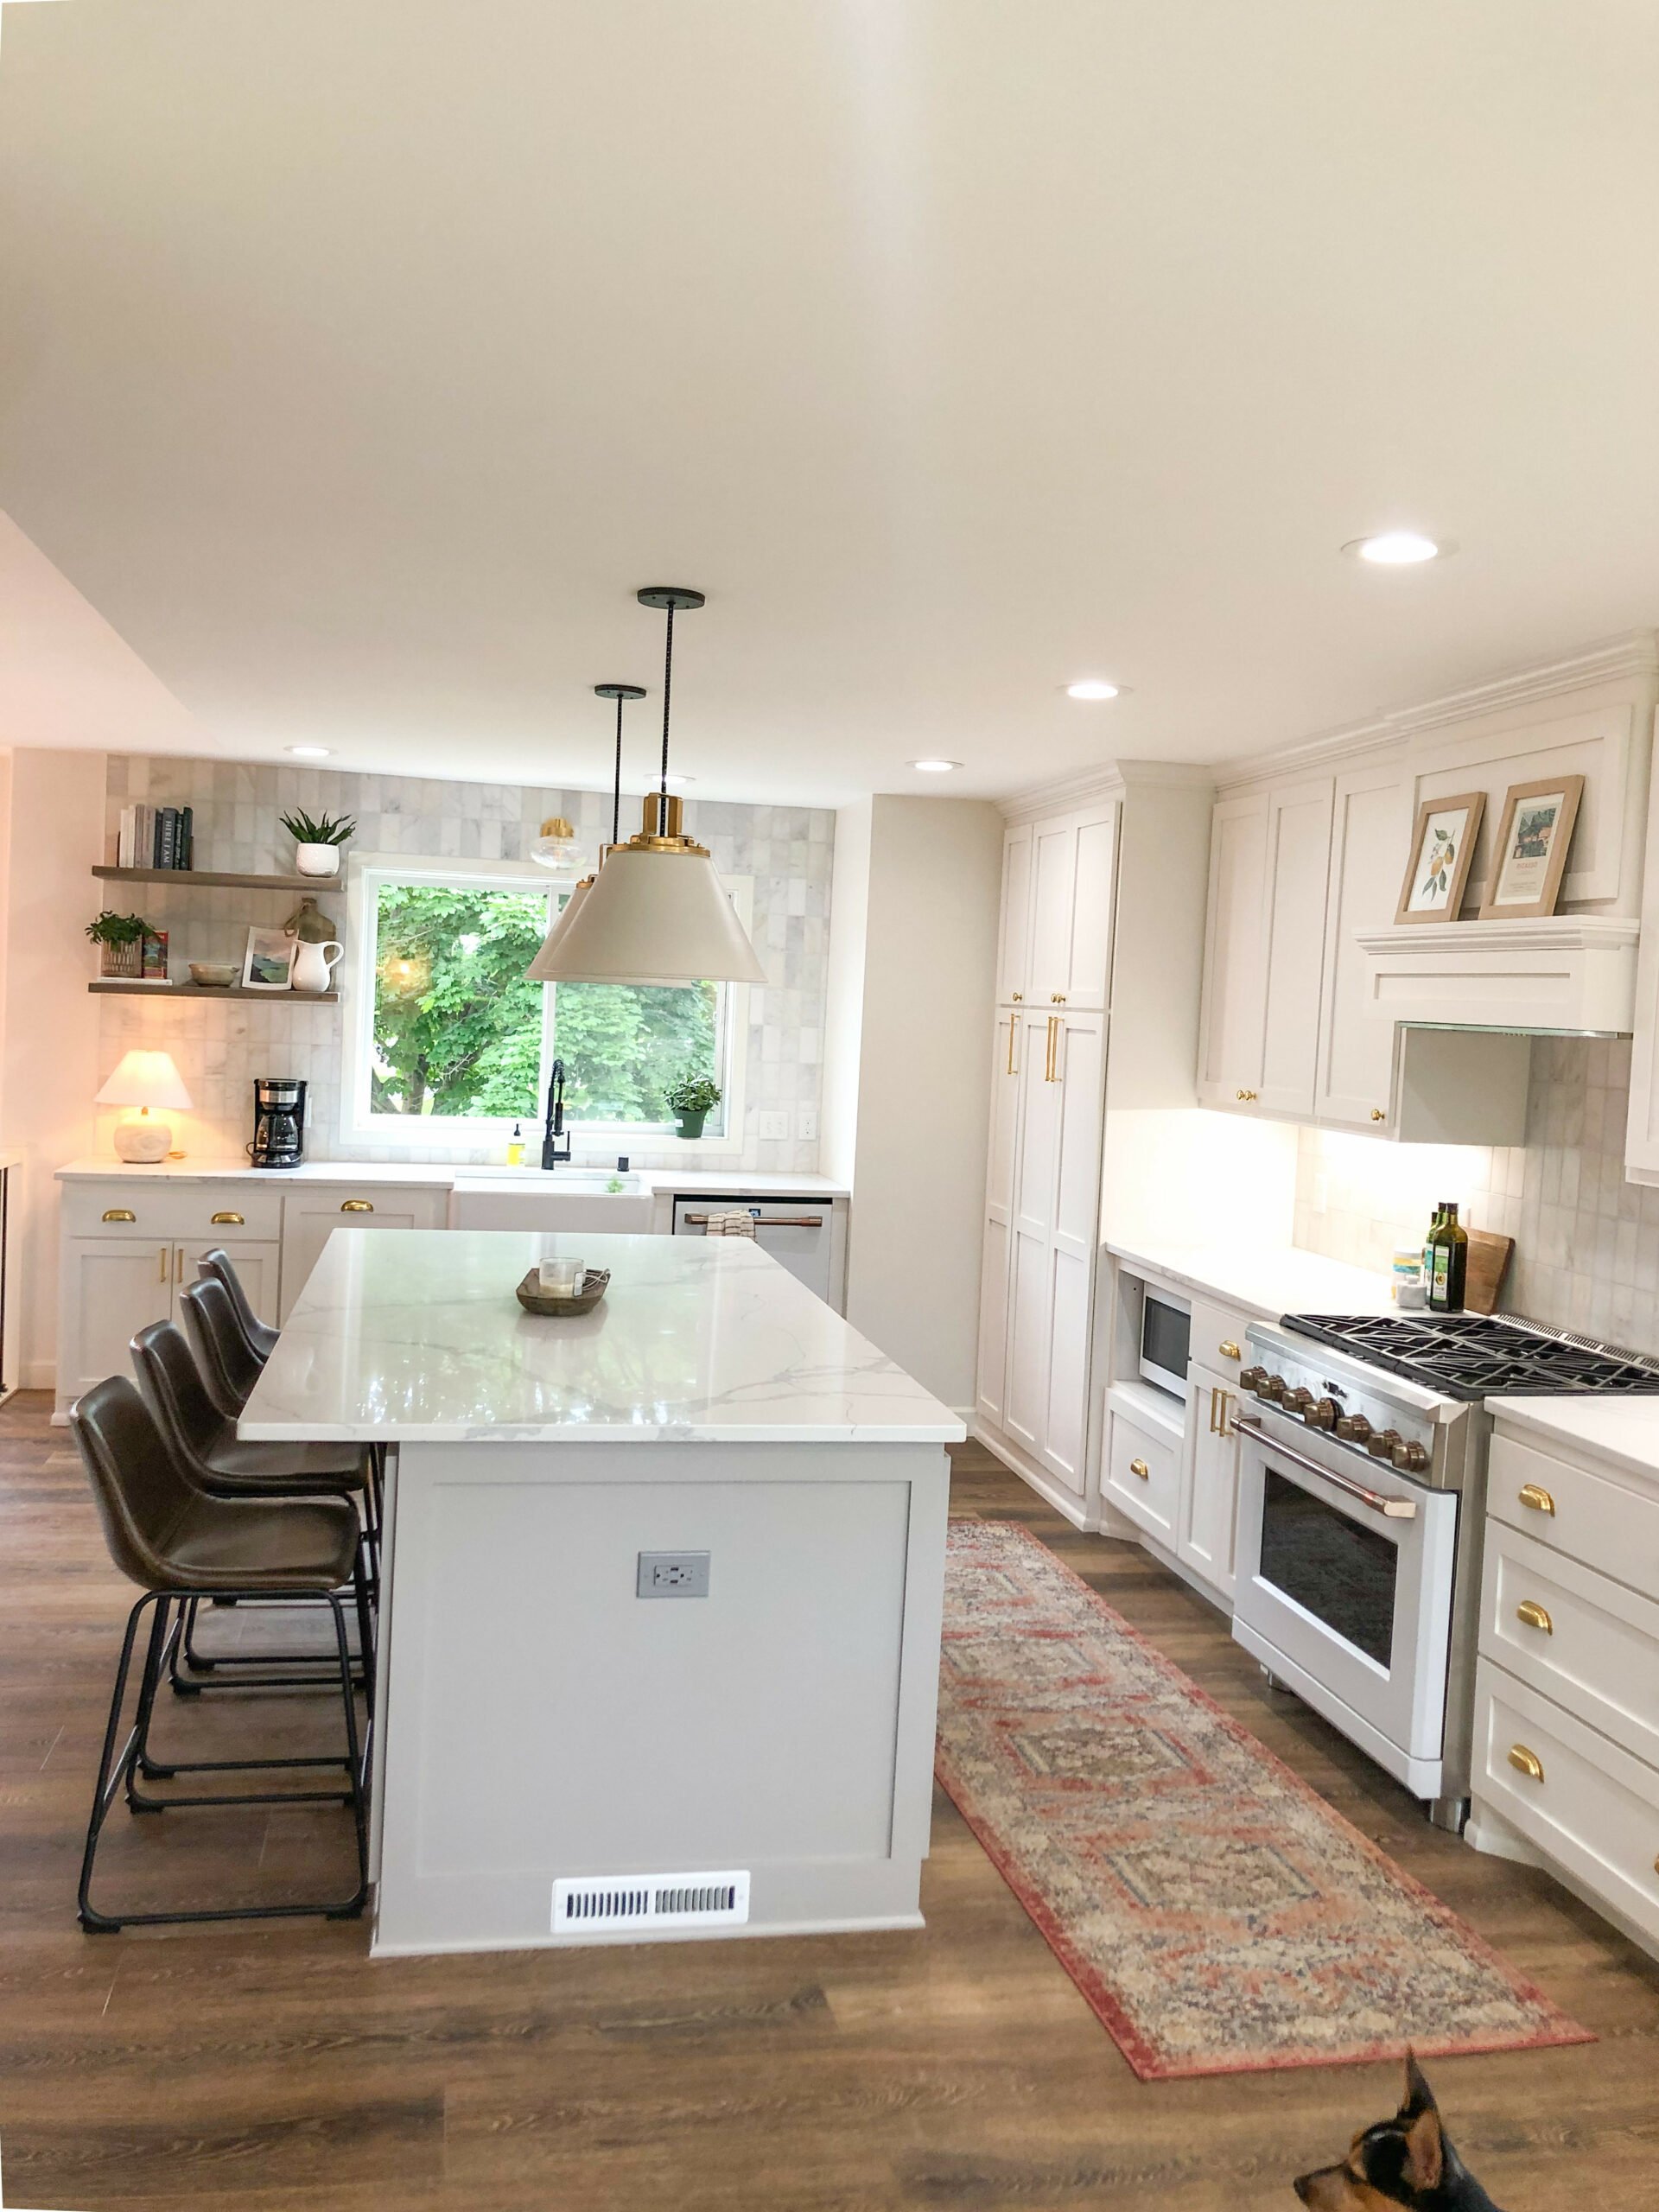
We replaced the tiny island with a massive 98 inch long by 48 inch island, with over 4+ feet to move around on all sides! With the island, it was important for me to maximize storage space, so the side with the overhang has 4 cabinets that are 12 inches deep for storing things I don’t need as often. I love it!
As for cost, it’s hard to separate out what the kitchen remodel was versus the addition and the rest of it, being our kitchen wouldn’t have been the same if we didn’t do the addition. The same is true with cost of flooring and trim, as we carried that through the entire main level.
However, the ballpark estimate for the kitchen part (not the addition/entry/deck/stairs) of the remodel was $55k, excluding appliances. The largest expense for the kitchen was the custom cabinetry, which totaled about 22k. Remodels can definitely be done cheaper by doing pre built cabinets and not moving all of the plumbing, electrical and HVAC, which were other large expenses.
Favorite Things We Did
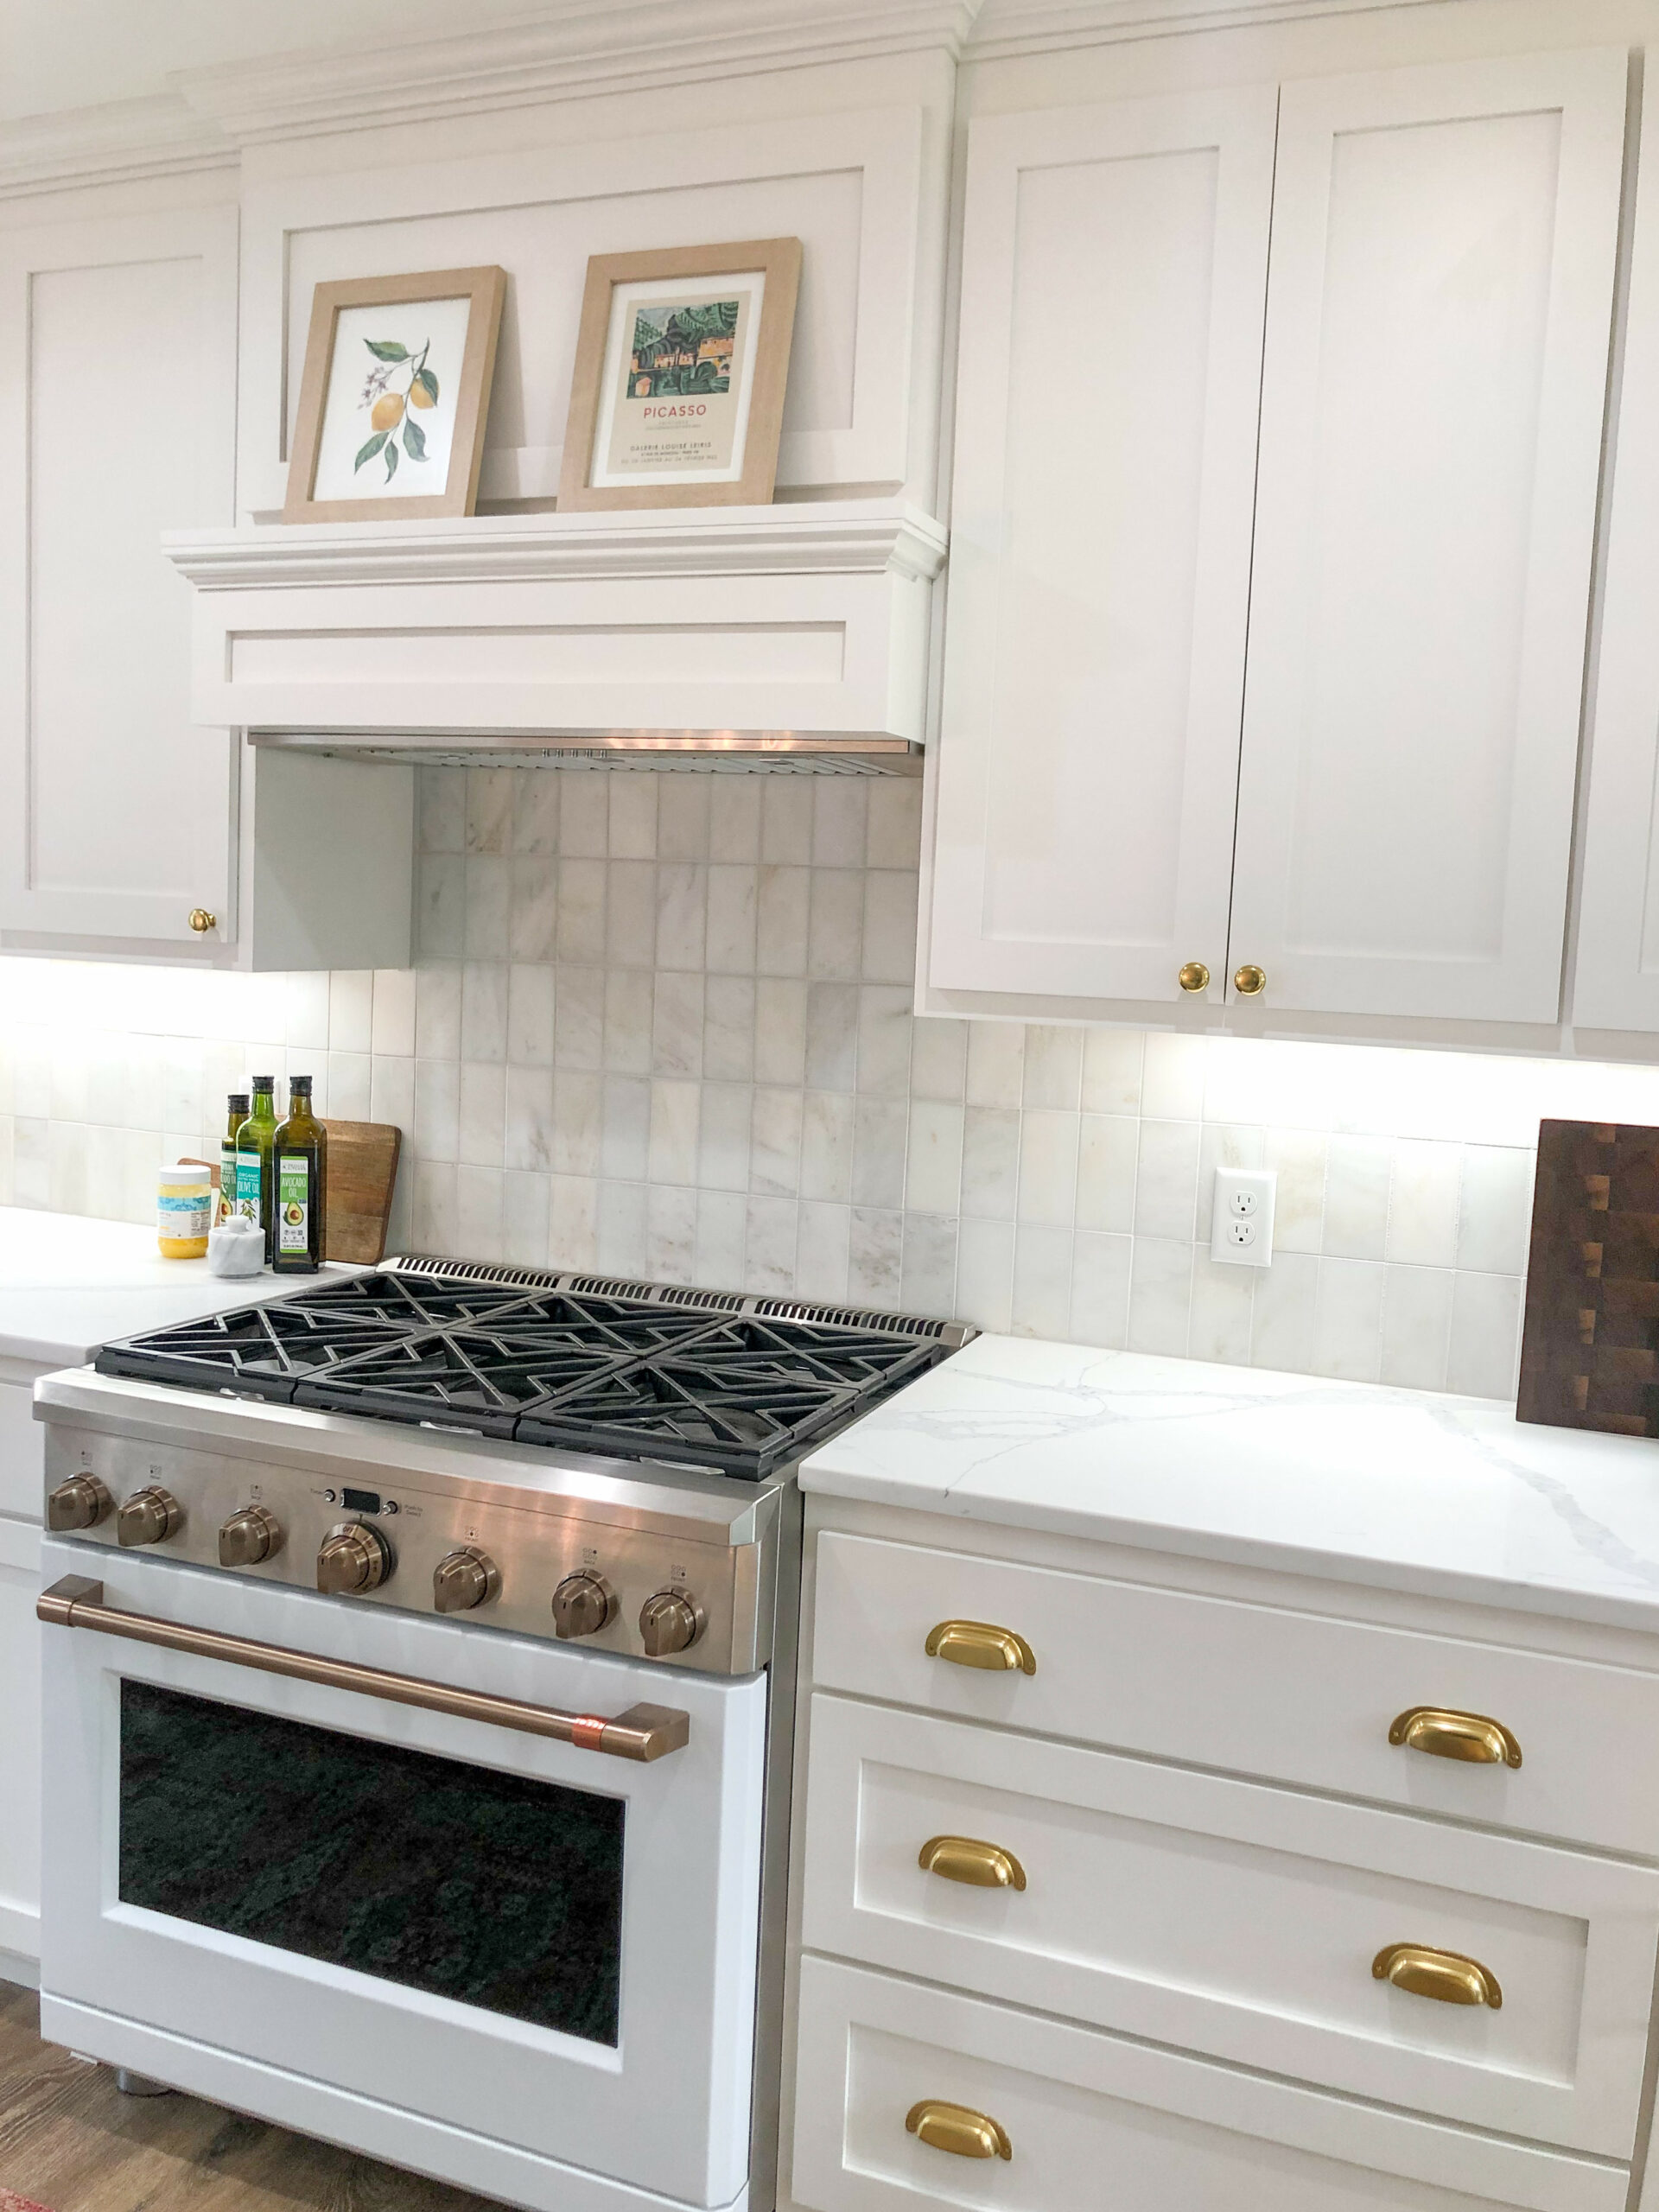
While I’m quite pleased with everything we did, there are a few things that I just am so glad that I included in the design. One of those things was that I really, really wanted a custom vent hood with a little bit of a lip/shelf. I loved the idea of being able to change the way it looks depending on the season or holiday, and be able to style it as the years go on as a way to add color and warmth. I just knew I did not want a metal hood showing, and I am beyond thrilled with how it turned out!
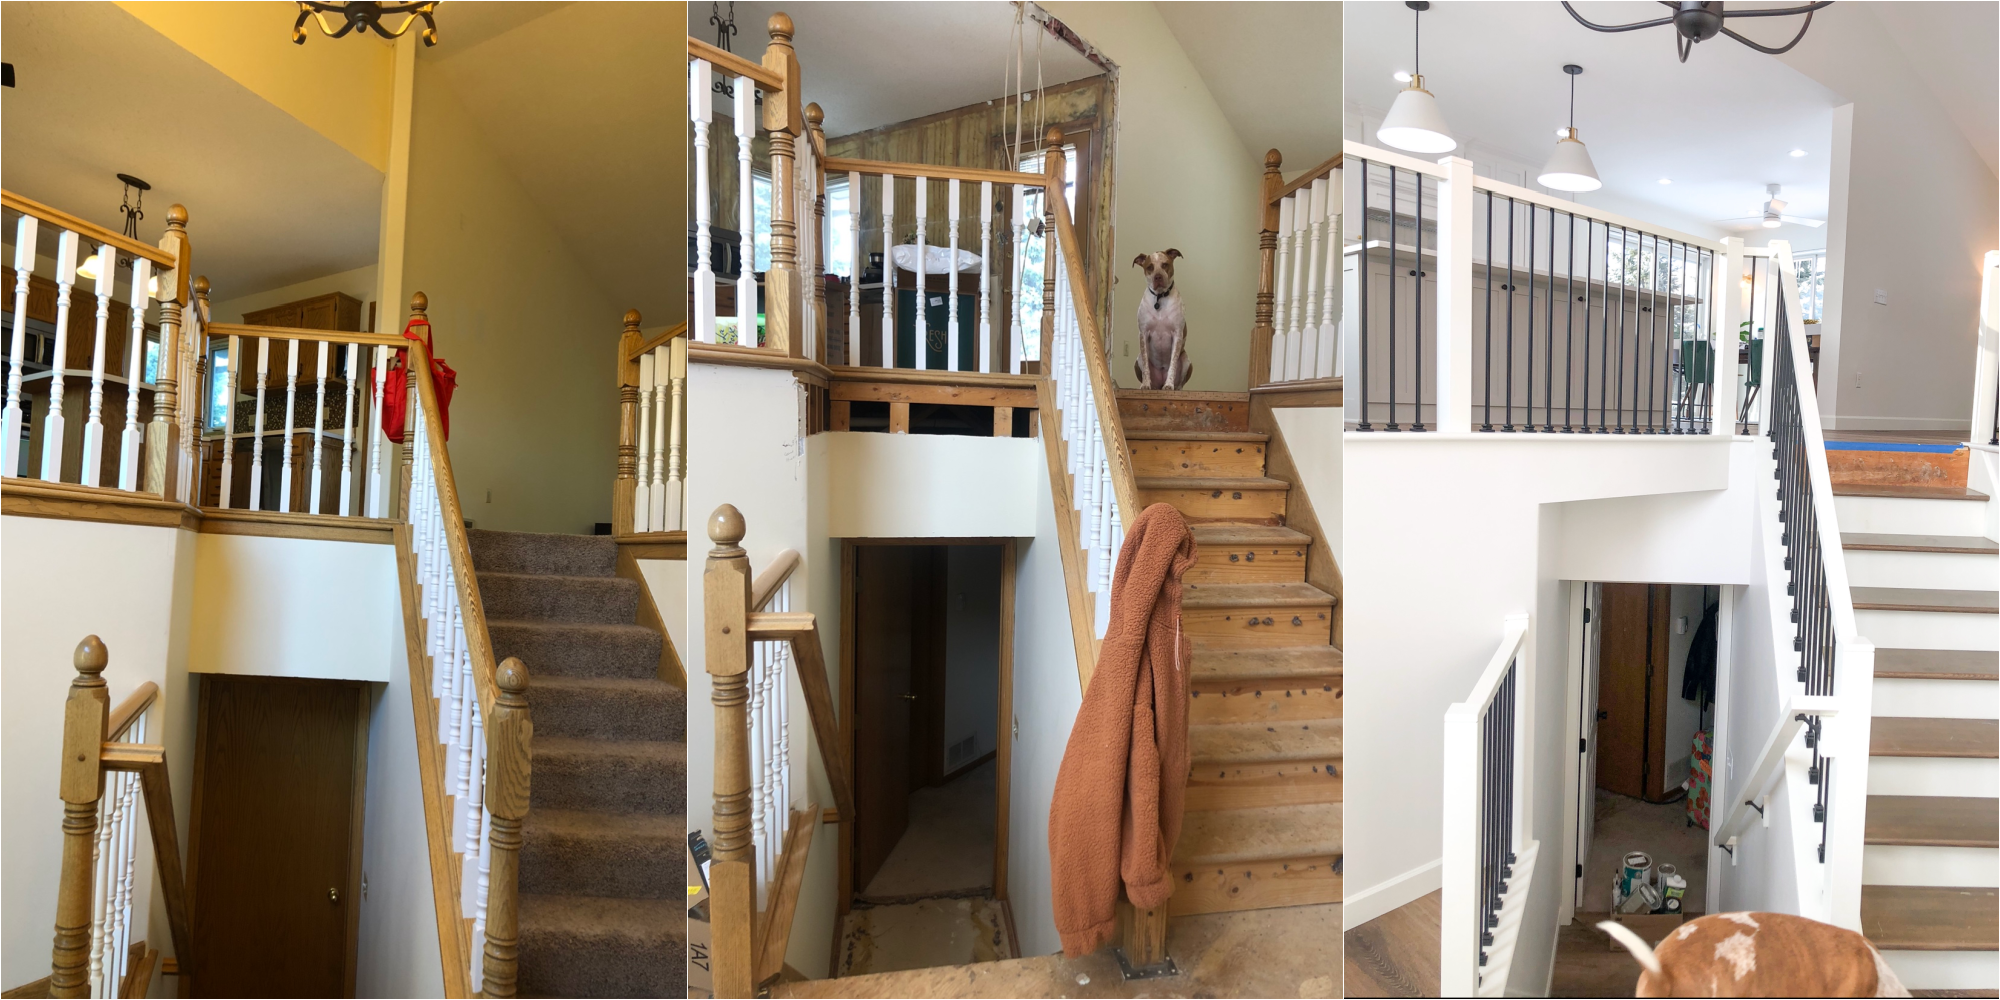
The stairs was something I was particularly excited about changing. When you first walked into the house the way it was, you were immediately smacked in the face by the bulky, orange wood railings. And, because it had this weird jut outs, there were a lot of posts, a lot of angles, and a lot of corners to that railing. It was just a lot of railing in your face. By straightening out the right side of the railing, we were able to add 3 feet of walking space in the kitchen.
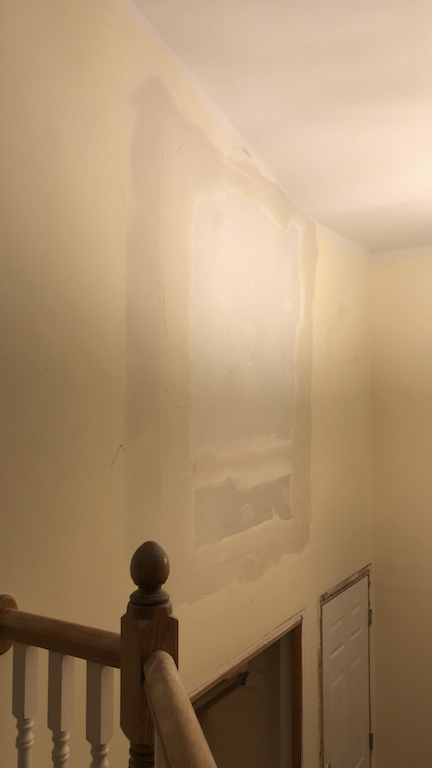
Another thing we changed was covering up this odd alcove that was in the entry above the closet. This is a really popular feature in many early 90’s houses to place decor. It had a large mirror in the back of it and was eye-level with the kitchen and just a very odd space. We walled it in and eventually that space will be used to add to the bathroom when we get around to that. It looks much more cohesive now and the double story entry way looks nicer and cleaner!
I love the way roll out drawers function for lower cabinets, in that you can see everything that’s in them without having to get on all fours to dig to the very back, but I love the look of lowers with doors that open. We did one bank of three drawers, and another drawer under the microwave cubby, and then the rest of them look like lower cabinets but all of them have roll out shelves instead of fixed shelving. They still function like the drawers, but have the door fronts. We did the same thing in the pantry area and spice racks, which I have two of on both ends of the island.

And of course the standard upgrades are so great and make this kitchen the most functional I’ve ever had! The USB plugs (we have 4 outlets that have them), under cabinet lighting, cabinet drawers made for specific pots/pans, roll out pantry drawers, floor outlets, bigger/better placed windows, can lighting in the ceiling, roll out trash and recycling, etc. It’s so great to have a work space that finally works for me!
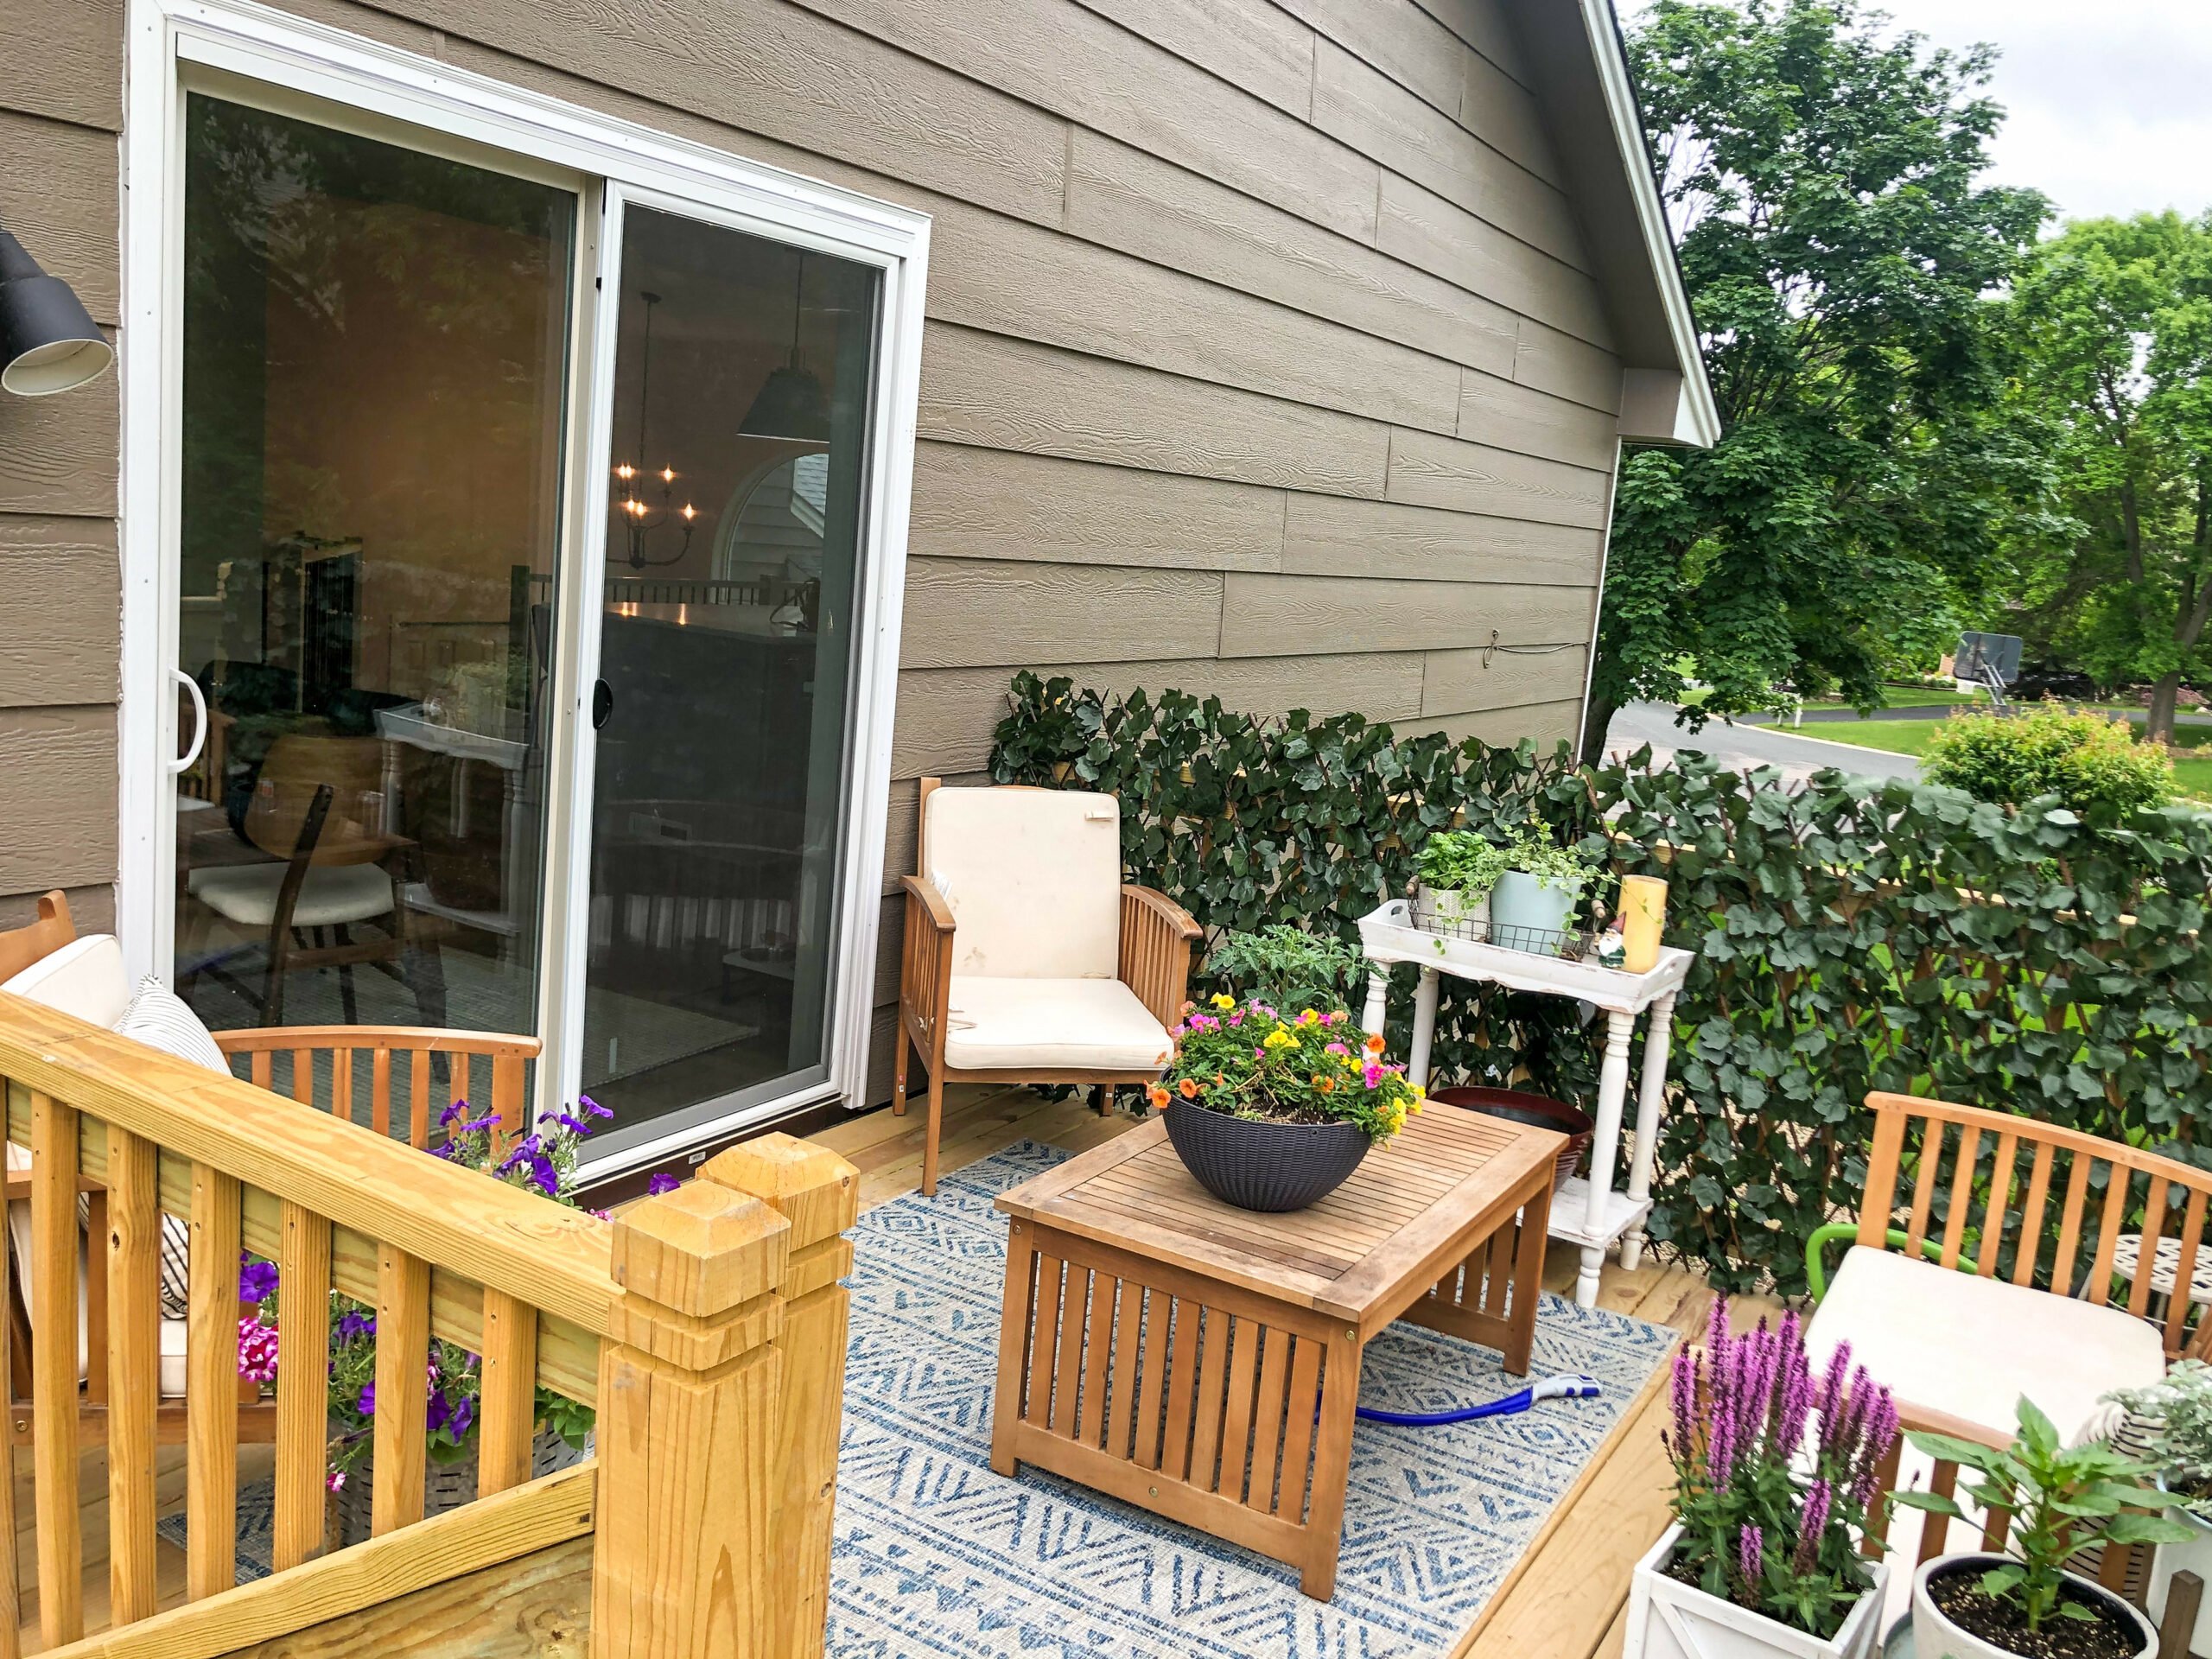
And of course, I love our new deck! It’s a bit bigger than the one that we tore down. It took for-ev-er to get the permit for it, but more than worth it being I spend so much time out here!
Links to Kitchen Products
Cabinetry – Vallar Woodworking
Flooring – Paramount RigidCORE XL Vinyl Plank, color Long Beach Tan
12 Inch Appliance Pulls (Brass)
8 Inch Pantry Cabinet Pulls (Brass)
4 Inch Lower Cabinet Pulls (Brass)
Backsplash – Honed Alps 3″x6″ Marble “Puccini by Duratile Corp. Model: MM6-28-H”
Countertop – Calacatta Quartz (from ERK Granite & Marble in Bloomington, MN)
White Cabinet Paint Color – Benjamin Moore White Dove
Island Cabinet Paint Color – Sherwin Williams Repose Gray
Cafe Matte White 36-inch Gas Oven/Range
Sub Zero 36-inch Panel Ready Fridge Drawers
Sub Zero 36-inch Panel Ready Fridge/Freezer Combo Drawers
Bamboo Adjustable Silverware Drawer Organizer
Bamboo Adjustable Drawer Separators
Kitchen Rug (Runner 2.7′ x 10′)
Dining Room Side (Plant) Table
Brown/White Dining Room Chairs
Navy Blue Silicone Dog Food/Water Mat
Black/Marble Elevated Dog Bowls







susan sebghati says
Absolutely beautiful remodel! Very functional also.